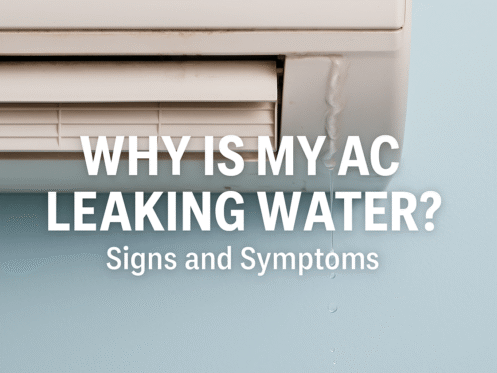
Finding a puddle of water near your air conditioner can be frustrating and concerning. While some moisture is a normal part of your AC’s operation, a noticeable leak often signals that something’s wrong. Ignoring it can lead to water damage, mold growth, or even costly system repairs. In this article, we’ll break down why your AC might be leaking water, how to diagnose the issue, and simple steps you can take to fix it. If the problem is more than a quick DIY fix, the HVAC experts at High 5 are always here to help.
How Does Your AC Produce Water?
To understand why your air conditioner might be leaking, it’s helpful to first know how it produces water.
Your AC cools your home by removing heat and humidity from the indoor air. As warm, humid air passes over the evaporator coil, moisture in the air condenses into water, much like condensation on a cold glass of lemonade on a hot day. This water collects in a drain pan and flows out of your home through the condensate drain line.
If everything is working correctly, you won’t notice this process at all. However, when one part of the system becomes blocked, damaged, or misaligned, water can accumulate and leak where it shouldn’t.
Common Causes of AC Water Leaks
Here are the most common culprits behind an air conditioner leaking water:
- Clogged or dirty condensate drain line: This is one of the most frequent reasons for water leaks. Over time, algae, dirt, mold, and debris can clog the condensate drain line, causing water to back up and overflow from the pan.
- Rusted or damaged drain pan: The drain pan under your evaporator coil can rust or crack, especially in older systems. When this happens, water has nowhere to go and ends up leaking into your home.
- Dirty air filter: A clogged air filter restricts airflow over the evaporator coil, which can cause the coil to freeze. When it thaws, the excess water can overwhelm the drain pan and lead to leakage.
- Low refrigerant levels: Just like a dirty filter, low refrigerant can lower pressure in the system and cause the evaporator coil to freeze. Once it melts, the resulting water may leak if not properly drained.
- Improper installation: If your AC unit wasn’t installed level or if the drain lines weren’t correctly connected, water may not drain properly, causing it to leak instead.
- High indoor humidity: In humid climates or during especially damp weather, your AC may pull more moisture from the air than usual. If your system can’t keep up with the extra water, it might overflow.
- Malfunctioning condensate pump: For AC units in basements or locations where gravity can’t assist drainage, a condensate pump helps move water out. If the pump fails, water can accumulate and spill over.
How To Diagnose a Leaking AC
Pinpointing the source is the first step to repairing your AC leak. Follow these steps to narrow down the cause:
Step one: Identify the location and severity of the leak. Is the water near the indoor unit, dripping from the vents, or soaking into walls or floors? The leak’s location can offer clues about the source and how urgent the repair might be.
Step two: Check the air filter and evaporator coil. Open the air handler and inspect the filter. If it’s dirty or clogged, replace it. Also, check the evaporator coil for ice buildup, which could indicate freezing due to airflow or refrigerant issues.
Step three: Locate the drain line (usually a PVC pipe near the indoor unit). Look for blockages or signs of buildup. You might be able to clear minor clogs with a wet/dry vacuum.
Step four: Examine the drain pan by shining a flashlight. Check for rust, cracks, or standing water. A damaged pan needs to be replaced to prevent ongoing leaks.
Step five: Check that your AC unit is level and that all drainage components are connected correctly. An uneven installation can cause improper drainage.
DIY Solutions for Fixing an AC Water Leak
If the issue is minor, you may be able to fix it yourself. Here are some common DIY solutions:
- Unclog the condensate drain line: Use a wet/dry vacuum to suction debris from the outdoor end of the drain line. You can also pour a mixture of vinegar and water into the indoor drain access point to prevent mold from building up.
- Replace the air filter: A simple fix that can improve airflow and prevent future freezing. Be sure to replace your filter every 1-3 months, depending on usage.
- Fix or replace the drain pan: If the pan is cracked or rusted, it needs to be replaced. For small holes, you can temporarily seal them with waterproof epoxy.
- Clean the evaporator coil: Use a soft brush or coil cleaner to gently remove dirt and dust from the evaporator coil. Turn off the unit before cleaning to avoid electrical hazards.
- Adjust unit installation: If your AC is slightly tilted, gently adjust it so that it’s level. Ensure the unit isn’t leaning backward or forward, as this can cause water to pool.
Always turn off the power to your HVAC system before performing any maintenance. The best way to make sure your AC is working in peak condition is to schedule regular maintenance.
Having Issues With Your AC Unit Leaking Water? Contact the HVAC Professionals at High 5
While some water leaks have easy fixes, others can signal more serious problems, such as refrigerant loss or broken components. If you’ve tried the basic steps and your AC is still leaking, it’s time to call the pros. At High 5, we provide prompt and reliable HVAC service throughout Denver and its surrounding areas. Our licensed technicians will quickly diagnose the issue, explain your options clearly, and get your AC running smoothly, without the mess. Contact High 5 today and say goodbye to unexpected leaks for good!

